Guest Posted originally on Not JUST a Housewife
Happy Friday to all you beautiful readers of Not JUST a Housewife!
My name is Heather from squeezing it all in.
I'm seriously squealing with delight right now to be here with you today!
Thanks so much, Stacy!
I want to welcome you into my world for a second before we get on with the tutorial business.
I don't know about you, but I have so many responsibilities in life it's hard to even keep track of them all, but one thing is for sure ... I am constantly striving to squeeze it all in.
I find joy in searching for the "little things" in life and love to encourage and motivate my readers to do the same.
What are "little things" you ask?
Here is the advice I've come to live by...
“Search for 5 'little things' that you are grateful for today, something that makes you smile – even for a moment. Something little. Something that could easily be overlooked.
If you can’t find 5 things…just find one.” -my angel Mother
"Little things" happen every day
they are the moments that most easily pass us by.
They are hard to see because there are so many.
We have to choose to find them and when we do…
they bring more joy and more love to our hearts and our lives…
they can change us.
The lovely Miss (Not JUST a Housewife) Stacy has joined our squeezing it all in treasure hunt for the "little things" in life ...
you can find her list HERE. It's just as amazing as she is -
go on and read it ... you won't be sorry!
I would LOVE for you to join our search too!
I also love to include my readers in my creating endeavors by timing my tutorials.
Timing myself helps me to "squeeze it all in" more efficiently and I hope it helps my readers to do the same.
(you can find these tutorials HERE)
Okay ... let's get on to the main reason I am here:
I have put together a special tutorial just for YOU today!
So let's get excited!!!
We are going to make customizable His and Her pillows.
I've seen so many wonderful His and Her pillows floating around, but I have been looking for something that had a little more personality and perhaps a little humor.
I've been drooling over ones like THIS and THIS and THIS and THIS.
Seriously ... I LOVE all of these and would probably just mop up my drooling mess and buy them all if I could.
But I can't.
So for now, I'm just going to let them inspire me to create this tutorial for you.
So, today we are going to take this:
and turn it into this:
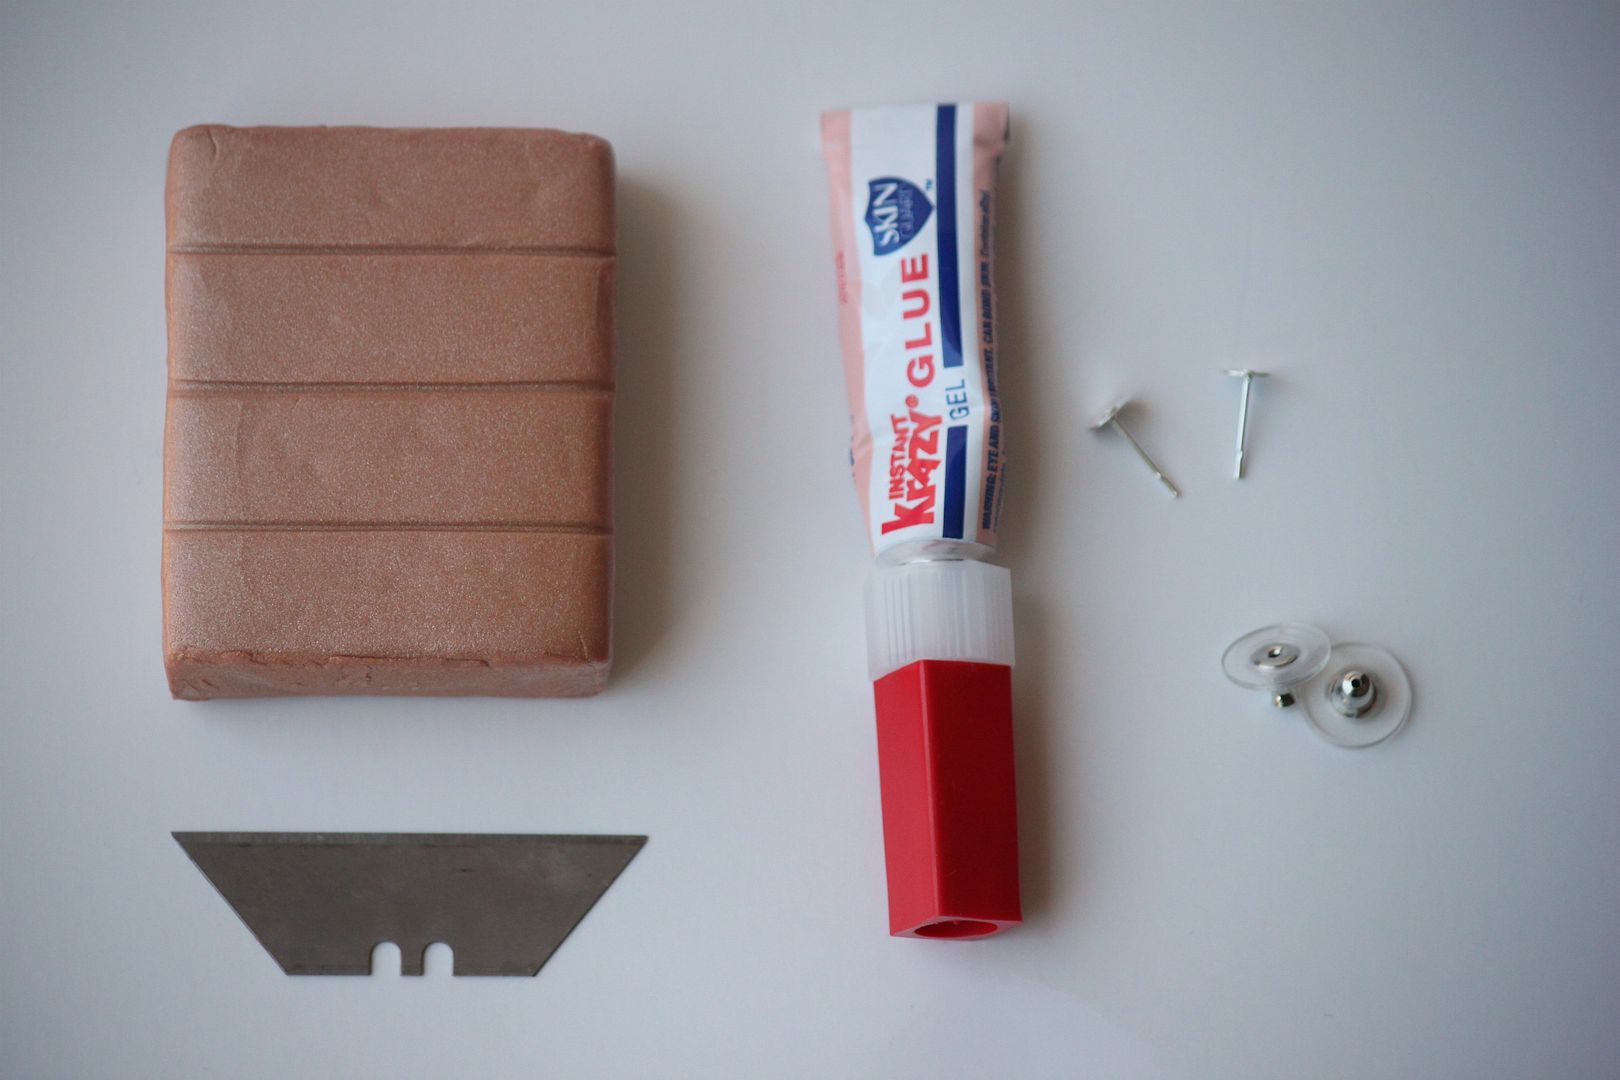
 You will need:
- approximately 1 1/2 yard plain material
(I used an ivory cotton blend)
- a material that you feel resembles your coloring and features
(I used felt and doll hair)
-rotary cutter (optional)
-scissors
-sewing machine
-thread of corresponding color
Let's start with preparing the pillow.
I'm not a fan of zippers on pillows so we are going to make a pillow with an envelope - type back.
I used 16x16 inch pillow forms so I cut 2 squares from the ivory fabric that measured 181/4 x 181/4 inches for the front of the pillow.
Then I cut 4 (2 for each pillow) that measured 181/4 x 12 inches.
These will create the envelope-type back.
Now that you have your basic shapes, take the back pieces and fold over 1/2 inch along one 18 1/4 inch side.
Then, iron it down like this:
Then fold it over one more time 1/2 inch until the edge looks just like this:
Then run it through the sewing machine with a 1/4 inch seam.
Now, before we can put the pillow together, let's work on customizing the front of our pillows.
Here is a picture of my Mr.Wilson, altered using Photoshop, but Dana over at MADE has the best tutorial on how to get the same effect using Picnik which I think is a more user friendly program.
I initially used this print out to create a stencil for a Father's Day shirt you can see HERE.
Then, I outlined just the features I wanted to highlight.
You can easily do this with any picture of you and your Mr!
Then I cut it out, pinned it to my felt, cut it out of the felt...
and ended up with this:
I centered and pinned it on my 18 1/4 inch square
(you can see my folded mark in the middle)
and then sewed around all the edges.
Repeat all the same steps for your Mrs. pillow ...
Mine was more time consuming considering I have the curliest hair I'm sure you've ever laid eyes on.
See ...
Then, I measured a box around my felt Mr. and Mrs. measuring 11x11 inches and I stitched with the corresponding brown thread all the way around.
 Then, I sewed all the way around again on the outside of the square I just stitched 1/4 inch away.
Like this:
(there's my curly doll hair ... makes for a pretty good likeness!)
 Now we're ready to put our pillow together!
Lay out the front of your customized pillow and assemble all pieces right sides together.
I placed one 18 1/4 x 11 (measurement after 1 inch seam is sewn) back piece on top of my front piece.
Then, the other 18 1/4 x 11 back piece layered over the first.
We should have a 2 inch overlap.
Pin in place.
And now sew together with a 1/4 inch seam all the way around.
Then, clip your corners like this:
Turn and iron flat.
Now we are going to top stitch around the outer edge of ALL layers to finish it off.
This will create the edging around the outside that I think really gives it a more elegant and complete look.
MAKE SURE you double check your measurements so you are absolutely positive your pillow will fit perfectly in there when you are finished!
If you followed all my measurements you should end up with an 3/4 inch seam around the edge.
And there you have it! Your Mr. ...
and Mrs. customizable pillows!
Ahhh! Now everyone knows just where they belong! hahah!
Enjoy!
linked up with:


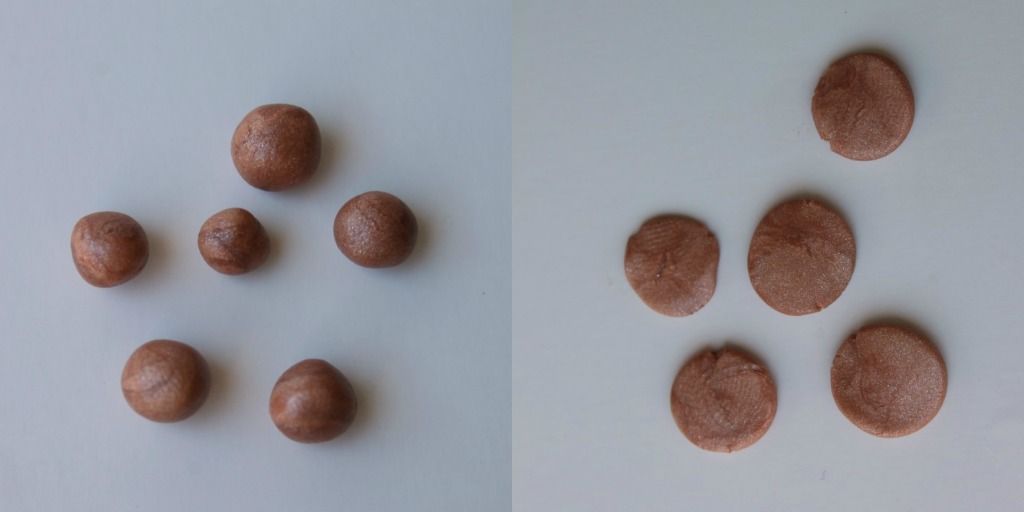 Roll about 6 little balls of clay. Flatten them out with your finger.
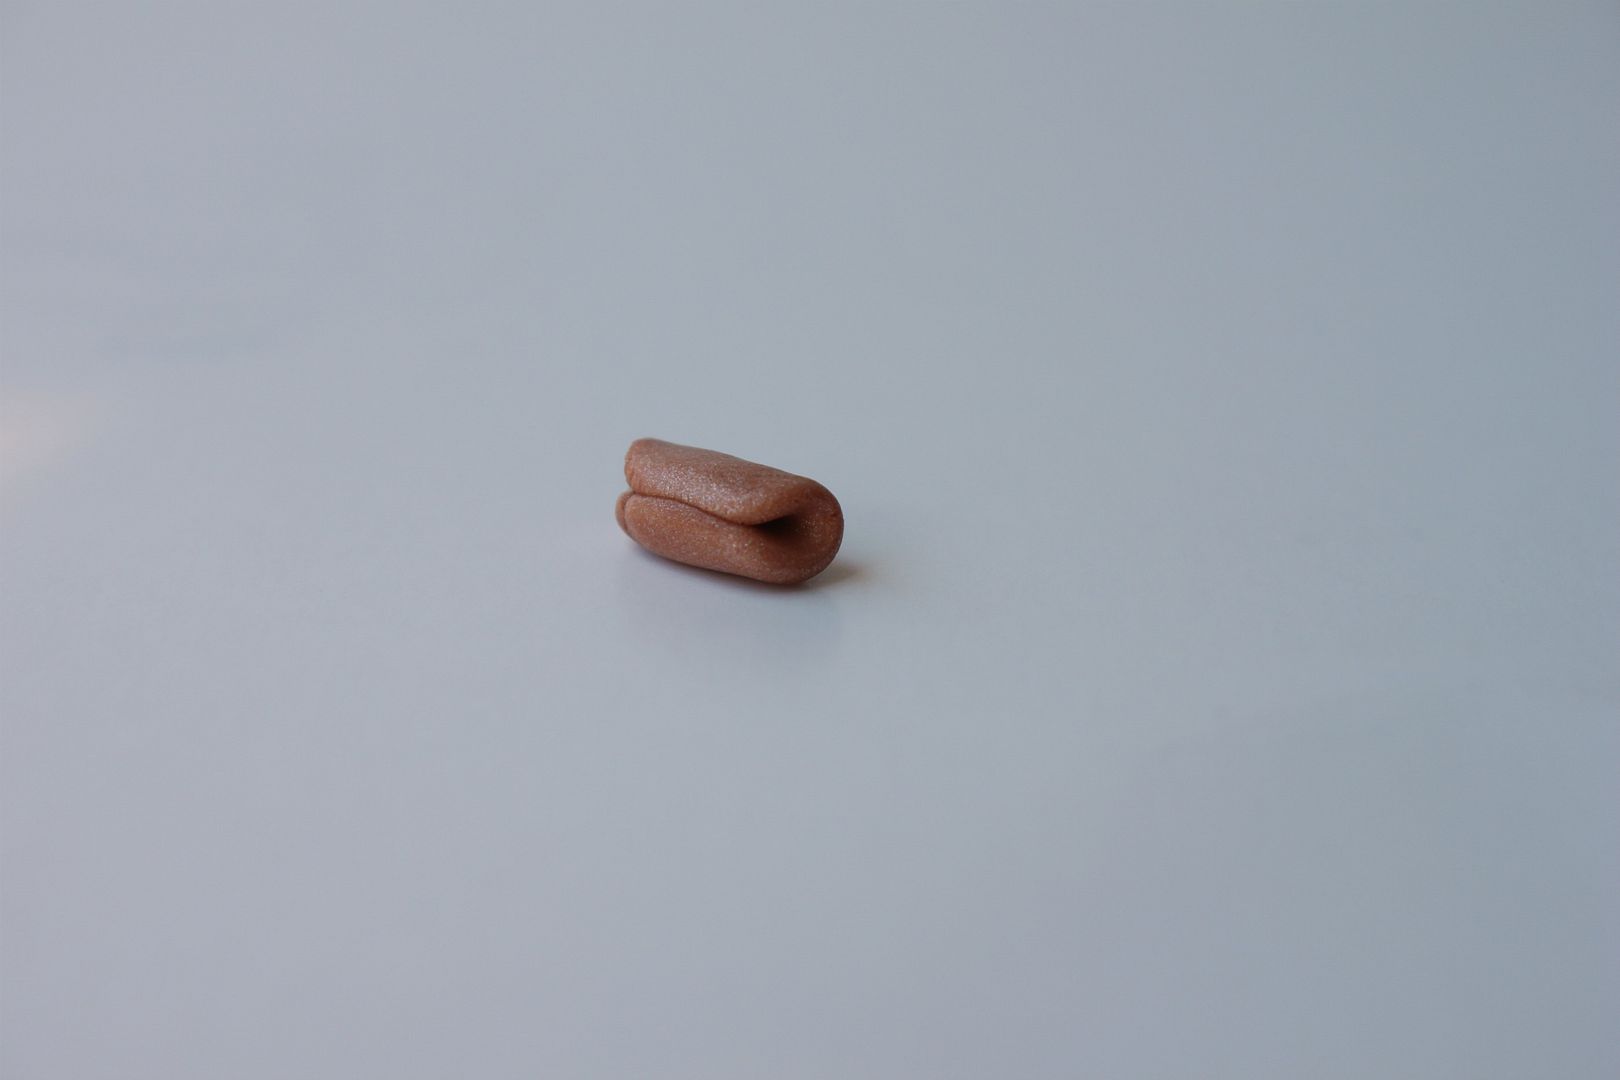 Fold one of the flattened balls in half. This is going to be the center of the rose.
 Place the other flattened balls all around the center piece.
 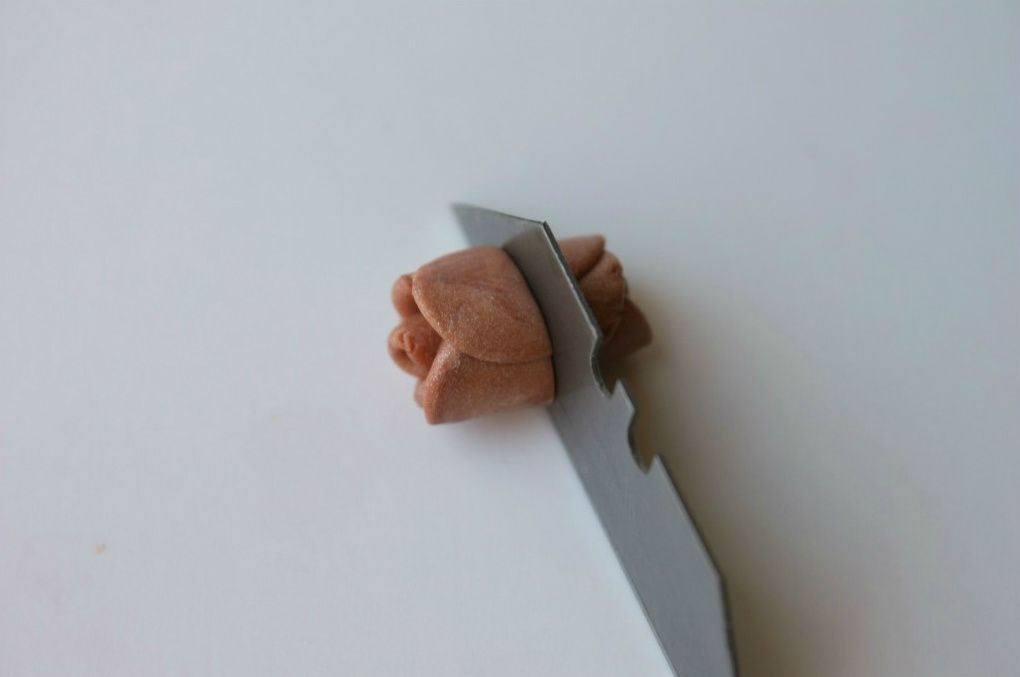 Slice off the end of the rose to make a flat base for the earring post.
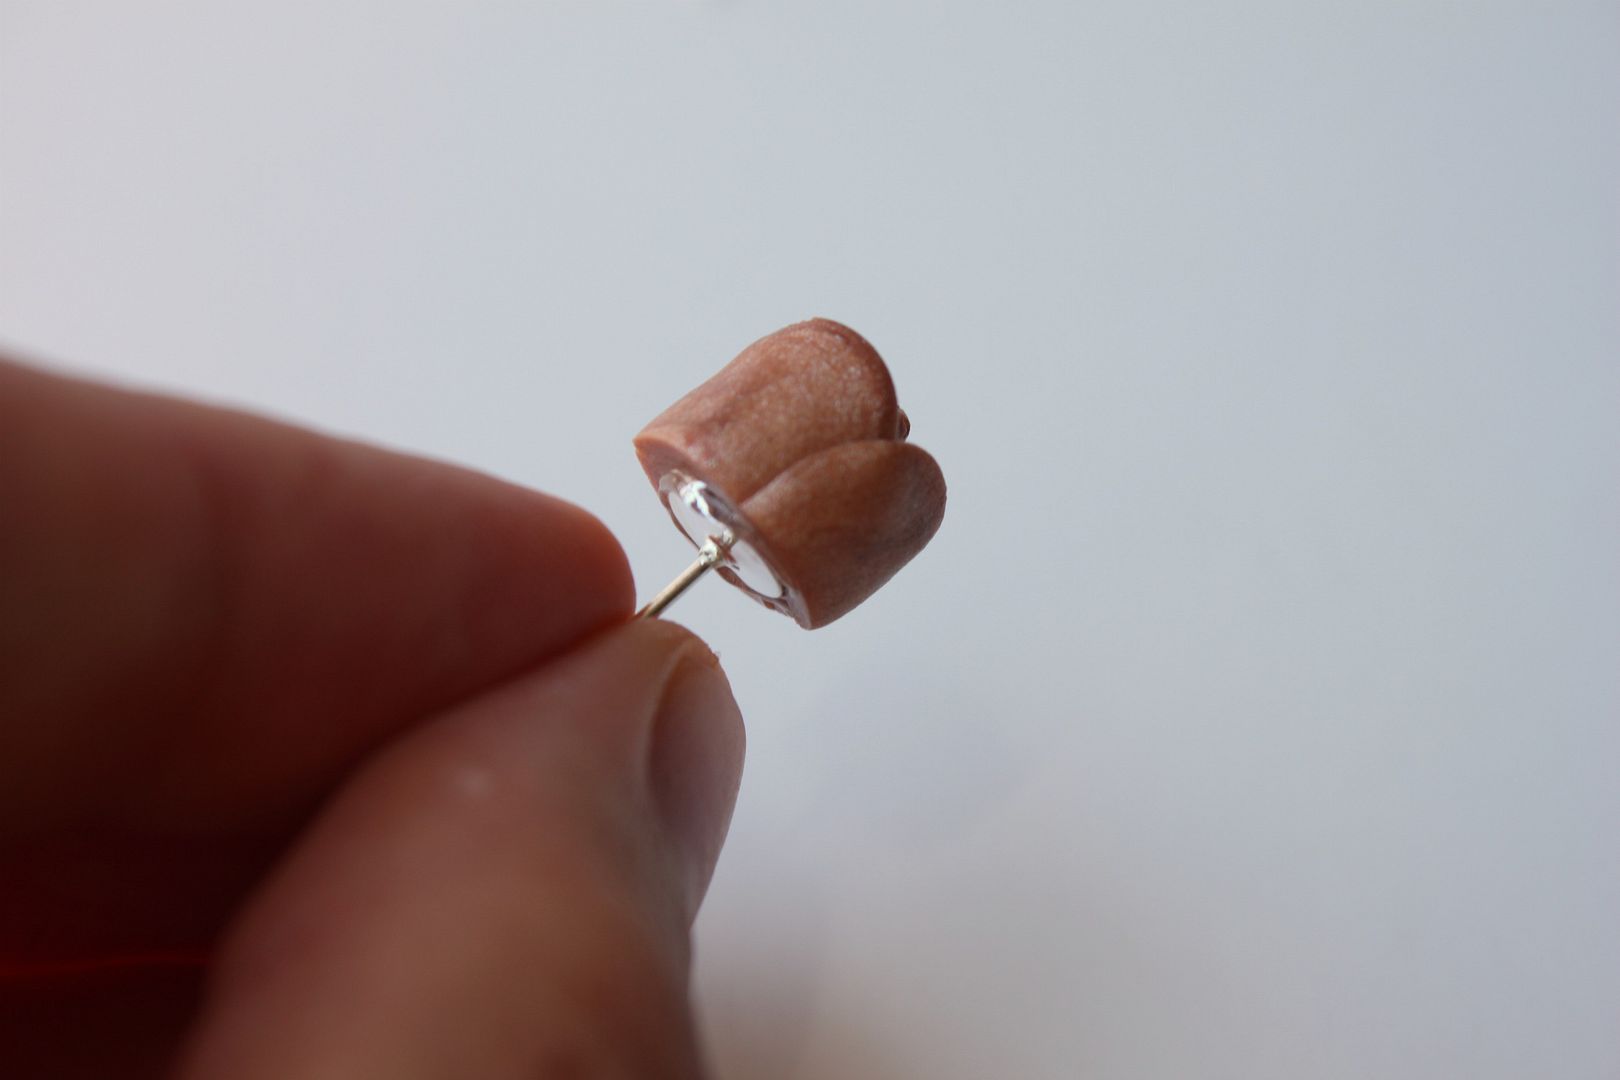 Krazy glue the rose to the post. This stuff is STICKY (duh) and I got it everywhere!
 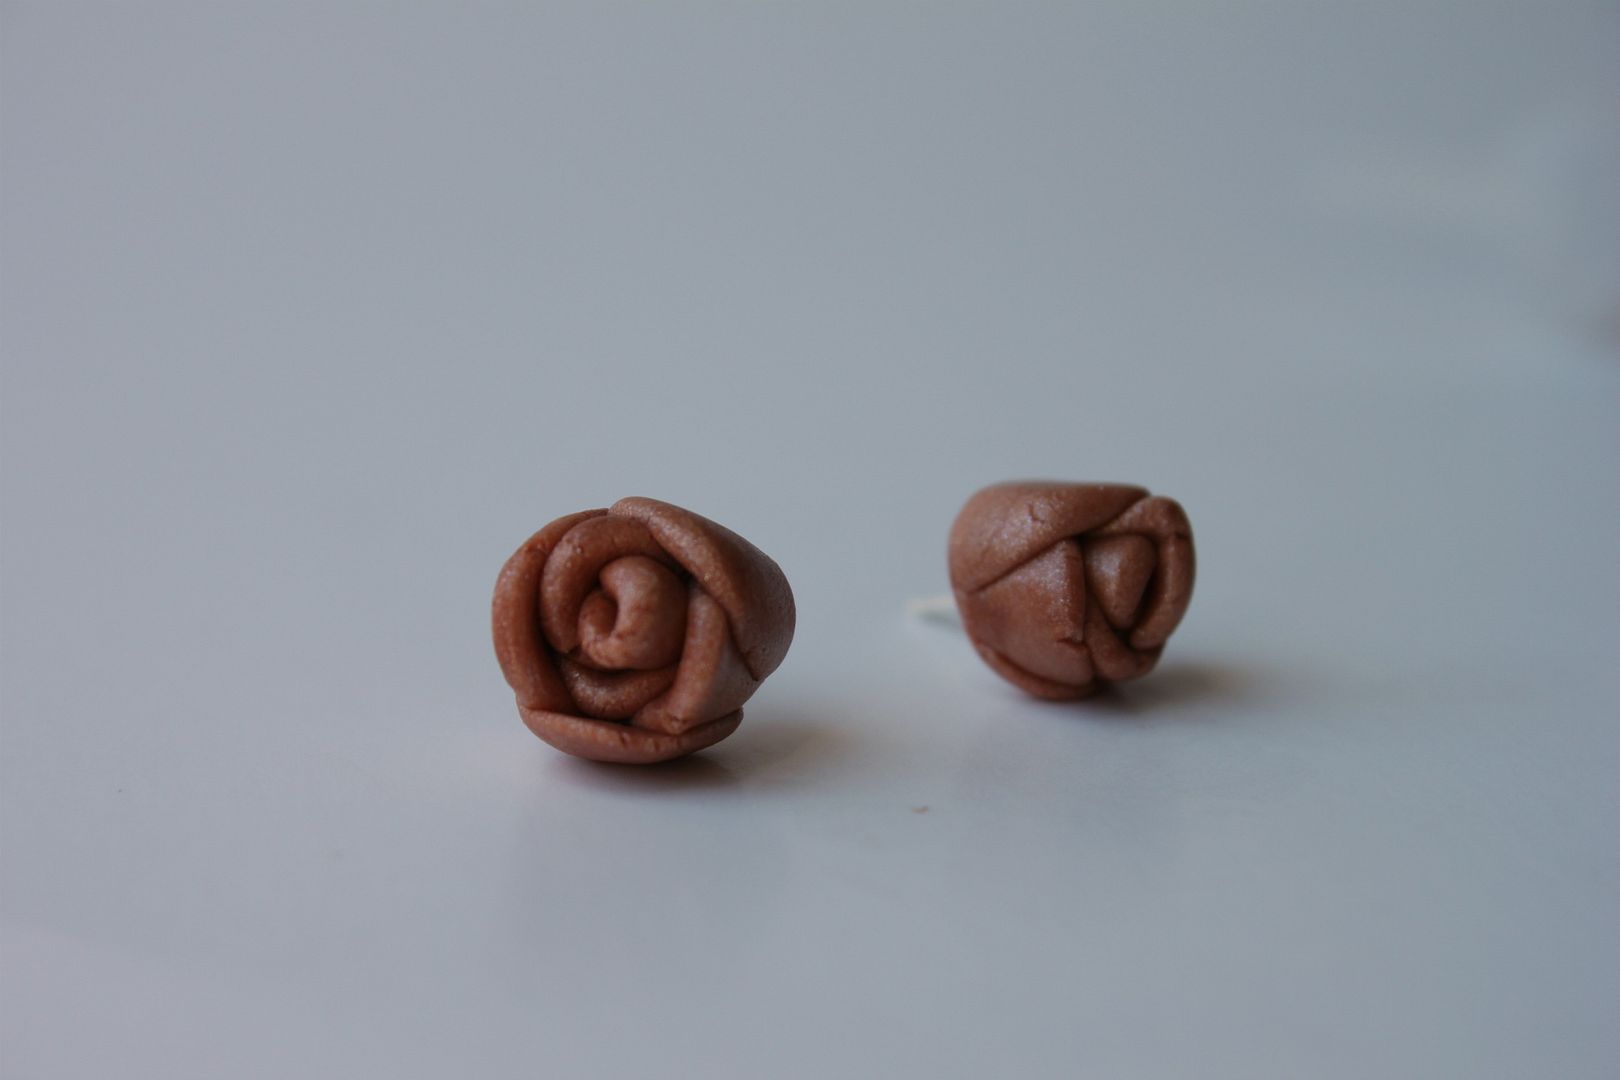 ALL baked and ready to wear!


