Showing posts with label project. Show all posts

Thursday, March 1, 2012

The Change for Change happened....

Do you remember last year when I started the Change for Change project?
I pledged to collect money for The Shine Project Scholarship Fund - dedicated to helping inner city high school students go to college and achieve their dreams.
With help from some of YOU we were able to meet our goal and fill the jar.
I sent our collections to my friend, Ashley, from The Shine Project and then waited patiently to see the faces of the lucky kids awarded.

Well, I was so EXCITED to see the pictures this week!
I wanted to make sure you saw them too.
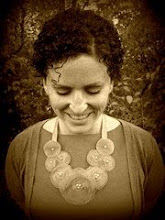
Click on over to visit Ashley and see the faces of the amazing kids whose lives YOU helped change.
Seeing the pictures made me want to reach through the screen and congratulate them myself.


Thank you for helping me help them.
And thank you, Ashley, for letting us be a part of the great work The Shine Project is doing.

Tuesday, December 20, 2011

Last minute gifts....

Are you scrambling to finish or find last minute gifts?
Here are a few places I love that have some really great ideas!


Monday, December 12, 2011

Christmas Joy...

I've got a 'to-do' list that emulates the 5 inch wide Children's Dictionary sitting on my green boy's lap.

There is so much to do and even more to catch up on.
And I can't seem to keep up.

I decided to start whittling away my Christmas 'to-do' list months and months ago so that I could enjoy the season and not be scrambling around to keep up with the disappearing days of December.

Unfortunately, I'm still feeling increasingly uneasy with each day marked off the advent calendar.

A few days ago, I was running around the house desperately trying to get some things checked off my list when my little blue boy fell apart at the seams. In reality, the ugly meltdown only looked like a great big road block to accomplishing my goals for the day.

Then, with his head buried in the tear soaked carpet, he pointed his chubby finger into the carpet fibers and said "Mommy, here".

I knew in that moment, what he really wanted.
So....I put down my armfuls of cleaning supplies and sat down next to him.
He didn't look up, but I put my hand on his back and just sat with him.
Somehow that was enough.


In that moment, I felt a peace and calm wash over me.
I realized that in-spite of my endless daily lists and constant plans, what was most important was to let go of the schedule and just be. To feel peace and comfort in the moment together.

Those feelings are what this season is really about.
We should be feeling peace and comfort as we approach the day we celebrate the coming of our Savior to this Earth to atone and sacrifice His life for each of us.

In that exact spirit, we have started some new traditions for this little Wilson family. We have begun a seasonal project to shine the light of Christ....the light of love, appreciation, and service into the lives of those among us.

We have started with small things such as these:

- drawing a picture, writing a note of thanks, and leaving homemade cookies for the garbage man
(he LOVED that....and wrote back!)

- carrying candy canes and baggies of cookies with notes of thanks in our bag and giving them to those who serve us and often go unnoticed.
i.e. the gas station attendant, the janitor who cleans the bathroom stalls, the fun ladies at the gym who play with the boys while I work out, the man who fills my up water bottle during spin class, the disabled boy who bags my groceries, the parking garage attendant....etc.

The list goes on and on!


- cooking dinner for a new Mom or just a busy Mom, like myself, who would appreciate a little break.


- buying a couple balloons and handing them to someone who looks like they might need a smile.


- Bringing a plate of cookies and a note of thanks to the firestation


- tape a few quarters on the vending machine or soda machine with a note 


- hold the door for someone

It has been such a joy to serve those around us...in small and simple ways.
It has been an even greater joy to watch my little boys learn about thinking of others, serving others, and loving others...Just as their Savior, Jesus Christ would do.

 Even though we are ALL overloaded with constant lists of things to accomplish....there is a more important reason for the season.
Go spread some Christmas Joy...

Thursday, December 1, 2011

The Cozy Holiday Wreath

Welcome to December!
It's officially here.

I'm working on decorating my house and finishing up as many Christmas preparations as I can, so I will be able to enjoy the Holidays instead of running around like crazy desperately trying to finish everything up at the last minute.

In the midst of my preparations, I designed a little something I wanted to share with you today that will be 'warming' up my home this year.
All it requires is a few cheap supplies, a little time, and beginner skills with a needle and thread.
(my sewing machine is broken at the moment, so all projects must be done sans machine)


What I used:
Thrift store wreath form $1.00
Thrift store over-sized red sweater .50 cents
a needle and thread
 My sweater had a ribbed band at the bottom that I cut off.
It measured 19 inches x 6.5 inches. I used this as my first layer.

I had a little extra that I trimmed off.
(the size fabric you need all depends on the size wreath you are making.)
 I laid the wreath form on top of the band of sweater material,
 then I folded one side over the other and used a quick (and rather large) whip-stitch to hold the edges together.
For help with a whip-stitch watch THIS video.
 I continued all the way around...
 And ended up with this.
I made this my first layer because I wanted the finished wreath to be a little thicker with the sweater material.
 I cut a strip of sweater slightly wider than the first strip to compensate for the fabric already sewn onto the wreath form.
Then, I wrapped it around and finished it off with a whip-stitch just as I did with the first ribbed layer.

If you are using a wreath form that is already thicker, than you won't need a second layer.
 Then I cut one more strip of ribbed sweater material
(from the collar of my over-sized sweater)
and in the same fashion as THIS tutorial, I made a big bow.

The only difference is that I hand-stitched the pieces together and didn't do a top stitch.
Then, I just hand-stitched the bow to the covered wreath.

There you have it.
A nice, new, cozy wreath to welcome all the cold Holiday nights to come.
 

Monday, November 28, 2011

Earmuffs Tutorial

It's not a secret that I have a lot of hair.
Don't get me wrong....I love my hair, but when you have a lot of hair, hats are out of the question.

I've tried lots of different options when it comes to winter head wear, but most don't fit well, or leave me with lots of smashed curls. After finding earmuffs at the donation center for $1.00, 
I decided to try earmuffs.
You want to make some for yourself?
So easy and inexpensive.
All you need is some scrap faux fur (mine was about $2.00)
and a set of earmuffs.

Tools you need:
sewing machine
thread
seam ripper
 Take apart the old earmuffs...

and use your seam-ripper to take off the old elastic,
but be careful because you are going to re-use the elastic
 When you are done put the old fabric circles down on your new fabric and mark it.
 Cut out your circles.
 Now you are ready to re-assemble.
 Pin your elastic to your new fabric and then stretch it out as much as you can. Hold in place and stitch about an inch.
Then stop, and stretch out the elastic again and repeat.
Continue this way until you are all the way around the circle.
  Reassemble your muffs with the new fabric.

 And you are done!
 $3.00 + 30 minutes = warm ears.
Or a cute, inexpensive gift!

Monday, November 14, 2011

Easy Elbow Patches

I don't know about where you live, but it's getting all sorts of cold around here.
I'm not one to crank up the heat as soon as we start shivering so we are breaking out all the sweaters instead.

I found this vintage mens sweater thrifting for $2.50 and I knew it's purpose as soon as I laid eyes on it!
Comfy and cozy with the perfect buttons!
First, I resized the sweater to fit me. 
I learned how last year from Miss Kathleen at Grosgrain.
You can see that tutorial HERE
She is A.MA.ZING! She's taught me sooo much!

Then, I cut out some ovals from brown polka dot scraps I had in my stash. These are going to be my patches.
I put the sweater on and bent my elbows. Then, I marked my sweater accordingly to know where to place my patches.
 I pinned my patches to the outside layer of my sweater...


Then I took thick brown thread and a tapestry needle.
I hand stitched, with a whip stitch, around the outside edges of the patches.

That's it!

Now, I have myself a brand new sweater!

Friday, November 11, 2011

What I've been up to....

Lately, time has been troubling me....for lots of reasons.
I know this little "squeezing it all in" place has been shoved down the priority list as a result.

I'm so sorry to be leaving you on the back burner for a little while, but hours everyday have been spent on the computer...designated to the final production of these wedding pictures.

What wedding? you ask...
The wedding I told you about HERE.
It was a beautiful occasion and I had fun creating some special
images for a really special couple.

Here are a few of my favorites to share:


I'll be getting back to some more regular posting soon.
Thanks for understanding.

Have a wonderful weekend!

Monday, November 7, 2011

New Tradition: The Thankful Tree

Last year, Miss Emily Rose, from Simply Vintagegirl blogged about what she called "The Thankful Tree".
I've been trying to conjure up a couple new traditions for my little family and when I stumbled upon this one...I knew it was for us!
So I put together my version... with a $1 glass jar from the thrift store, some leftover ribbon and curly twigs.

 I had these tiny little pumpkins for a while and always been in love with them, but haven't found a really great purpose for them until now.
 The only other thing we need is a bowl filled with empty tags waiting to be filled with thankfulness.

I have challenged my manly crew to write something they are grateful for everyday this month...I'm participating as well.

So far, I'm really enjoying reading their thoughts as we begin to fill up our tree.

And when it's time to take down our tree I will save all the filled tags in an envelope marked with the year so we can always remember the "little things" we shared with each other.

I love this grateful time of year, but I wish we could keep it alive all year long.
I'm sure if we were always in a state of looking for the positive "little things", or blessings (no matter how big or small) in our lives we would all find ourselves much happier and more willing to serve one another.

This "Thankful Tree" might just need to remain a permanent fixture in our home.

Monday, October 31, 2011

Happy Halloween...

We had a fun little pumpkin carving date with friends in preparation for All Hallows Eve.
Now that the night is upon us we will be celebrating with good food, super hero capes, and LOTS of candy!
See you tomorrow!

Wednesday, October 5, 2011

Bunnies...

I decided a while ago that this Christmas is going to be mainly a handmade Christmas....I know, I know...
Thinking about Christmas before Halloween. Crazy!??!
I don't know....I just think of it as smart planning.

I've been starting preparations and gathering supplies like I showed you HERE and I have one project done.

I found the tutorial HERE and if you click through to HERE you can see the instructions with pictures - 
my favorite!
(It took me a little over an hour from start to finish. 
That includes hobbling up and down the stairs to reach my sewing machine with my still healing knee...so that most likely means less than an hour for you!)
The only step I changed from the tutorial was that I sewed the facial features BEFORE sewing the body pieces together....I thought that would cut down on time and frustration!
Now I will just stash these away and hope some littlies in my life will be happy to drag these cute bunnies around come gift giving time!

Monday, September 26, 2011

DIY Mirror Frame and magical powers

How was YOUR weekend?
Mine was great!
Time with family, fun with friends, a magic show with the littlies, WAY too many sweets, beautiful weather, and another project done!
 
I offered up my hands to help in the final stages of Mr. Wilson's latest project: A Mirror frame.
Here is a quick rundown via pictures...

Frame building, sanding...
Banging, scratching, beating...
Staining...
And installing.
 
Oh, and one sad moment when green boy burnt one of his little fingers while making delicious cookies.
 
Luckily Mom's kisses have all kinds of magical powers.

See you tomorrow!
Related Posts Plugin for WordPress, Blogger...